Showing posts with label Amigurumi. Show all posts

7.12.2015

The Hobbit- Smaug Amigurumi

    I know, I've already done Smaug before. But this time, I somehow got it in my head that I need to make my dragon proportionate to the dwarf company. I sure know how to make trouble for myself... This is my first time attempting an amigurumi of such massive size, and for a long time I felt like I'm in way over my head.

This is an early photo of Smaug, from waay back in February:


Do excuse the mess on my desk XD. This was taken when I just passed the point of no return. The head alone took over 4 skeins of yarn, and I was seriously worried about budget and time. I wanted Smaug to be the centerpiece of my Hobbit amigurumi exhibition, and it felt like I was never going to be able to finish. After completing the rough shape of the head, I considered just making the head, stick it to a plague of wood, and make it a dragon trophy. And I would have totally done that, except a friend of mine told me not to cop out, and I was crazy enough to listen to him.

The end product took me over two months, used up over 50 skeins of yarn, and is about 2 meters in length. A billion thanks go to my boyfriend and my roommates, who all have had to deal with the half finished dragon taking up a whole lot of space.

Anyhow, I am proud to present... Smaug the Terrible!!


The design is based off the final design of Smaug in the film, so it is two-legged instead of four like the smaller version of Smaug I made before.

Smaug makes the perfect sleeping companion. he is so huggable and the neck is perfect for slipping an arm under, and the wings are so big they can serve as blankets. It's like one of those boyfriend pillows. Hmm, now that I think of it, I should have put a recording of Benedict Cumberbatch's voice in it......

Oh, and here are some photos of the month-long exhibition of the dwarves. You can see little Smaug resting on big Smaug's wing. =)


I'm the one reading the book~ =)

2.19.2015

The Hobbit- Amigurumi Dwarves

There's been some new additions to Thorin's company, and by some, I mean lots! 


Meet Gloin and Oin...


... Bifur, Bofur, and Bombur....


... and Ori and Dori. For those of you wondering where Nori is... well, he was supposed to be done after Dori, whose hairstyle gave me such a hard time I got mad and decided I need a break from dwarves (Like Gandalf often felt, I'm sure). So I'm sorry Nori, but you'll just have to wait. For now, let's just say Nori overslept and hasn't made it yet XD

And last by not least, behold! King under the Mountain, Thorin Oakenshield, son of Thrain, son of Thror!


I put a synthetic diamond on Thorin's belt, It's no Arkenstone, but hopefully it'll compensate the fact that I left him beardless (and looking remarkably like Loki) for days before I finally felted on his beard.

Anyway, the weather was lovely today, so I took them all out for a little photo shoot!


Bombur snoozing away XD
Snow White and the 12 dwarves plus 1 hobbit? XD
It's going to be very apparent by the end of this post that I totally ship Thorin and Bilbo. Just getting that out of the way. 
I guess I was still caught up in the Valentine spirit even a week after Valentine's Day, because somehow by the time I realized it, I was taking loads of photos of Thorin and Bilbo. Before long it started to feel like I was taking wedding photos XDD Here are a few:


I still can't get over how adorable they are! 

Hopefully I'll recover from the dwarf hair/beard style nightmare and finish Nori and complete the company. 

Also... good news!! The dwarves plus Hobbit are going on exhibit for an entire month at the NTNU Art and Humanities Festival! So if anyone reading this is going to be in Taipei this April to May, do come and see them in person! I'll post more details when I'm given more information regarding the exact date and place. =) 


1.27.2015

Don't Starve - Chester Amigurumi

It's winter break now, and I've been playing Don't Starve Together with my boyfriend, who got the game for me as a Christmas present. We're now on day 200+ (I'm playing as Wilson, by the way.), surviving reasonably well with a self-sustaining base. Take a look =)


We both just looove Chester, as was ecstatic when we found the eye bone. Chester's been living at our base, and we take him on adventures. Here's me dancing with Chester.


And here is a bonfire night with friendly pigs after a walrus hunt. Chester is really warming up to our  pig friends XD


So then I was looking at the Don't Starve wikia, and saw that they've made a Chester plushie!! Naturally, I have to have one too, and so I decided to make my own:


Ta-da~~ Do excuse the fact that the picture was taken on my bed XD He's made with furry orange yarn, which is very soft and doesn't hold its shape very well, so I added another layer inside with brown acrylic yarn. I also made the eye bone, which fits right in the chest, with enough room left over for a phone or other trinkets.  


The pattern is pretty straightforward, basically two halves of a sphere sewn together. I didn't take notes while I'm making this (it cut in line on front of a bigger project so I was in a hurry to finish) so I don't have a very specific pattern. Feel free to message me if you wan to make one and have trouble deducing how something is done.
  
We also have a pet Koalefant, which I am adding to the long list of things I want to make. Everything in Don't Starve is just so adorable! Might be seeing more DS amigurumis from me in the future~ 


9.29.2013

Bioshock Infinite- Elizabeth Amigurumi Free Pattern

I'm not really much of a gamer. I sucked so bad at FPS games that I tend to die within 5 minutes of any kind of fight. So yeah.

I do however love to watch playthrough videos, so I can enjoy the storyline without being killed like, 5 times an hour.

So a few months back I finished watching the youtuber Cry's playthrough of Bioshock Infinite, I was completely hooked. I love the art, the story... basically everything. And this is one of the few games to reduce me to actual tears... ah but I won't spoil anything in case anyone reading this hasn't played (or in my case, watched) the game yet.

Anyway, I'm totally in love with Elizabeth in the game. Straight up there with Midna and Zelda on my list of favorite female characters! She's got personality, an amazing back story, and none of that whiny damsel in distress quality that annoys me to no end. Just recently, I've begun preparing my Elizabeth cosplay costume for a convention in Taipei in December!

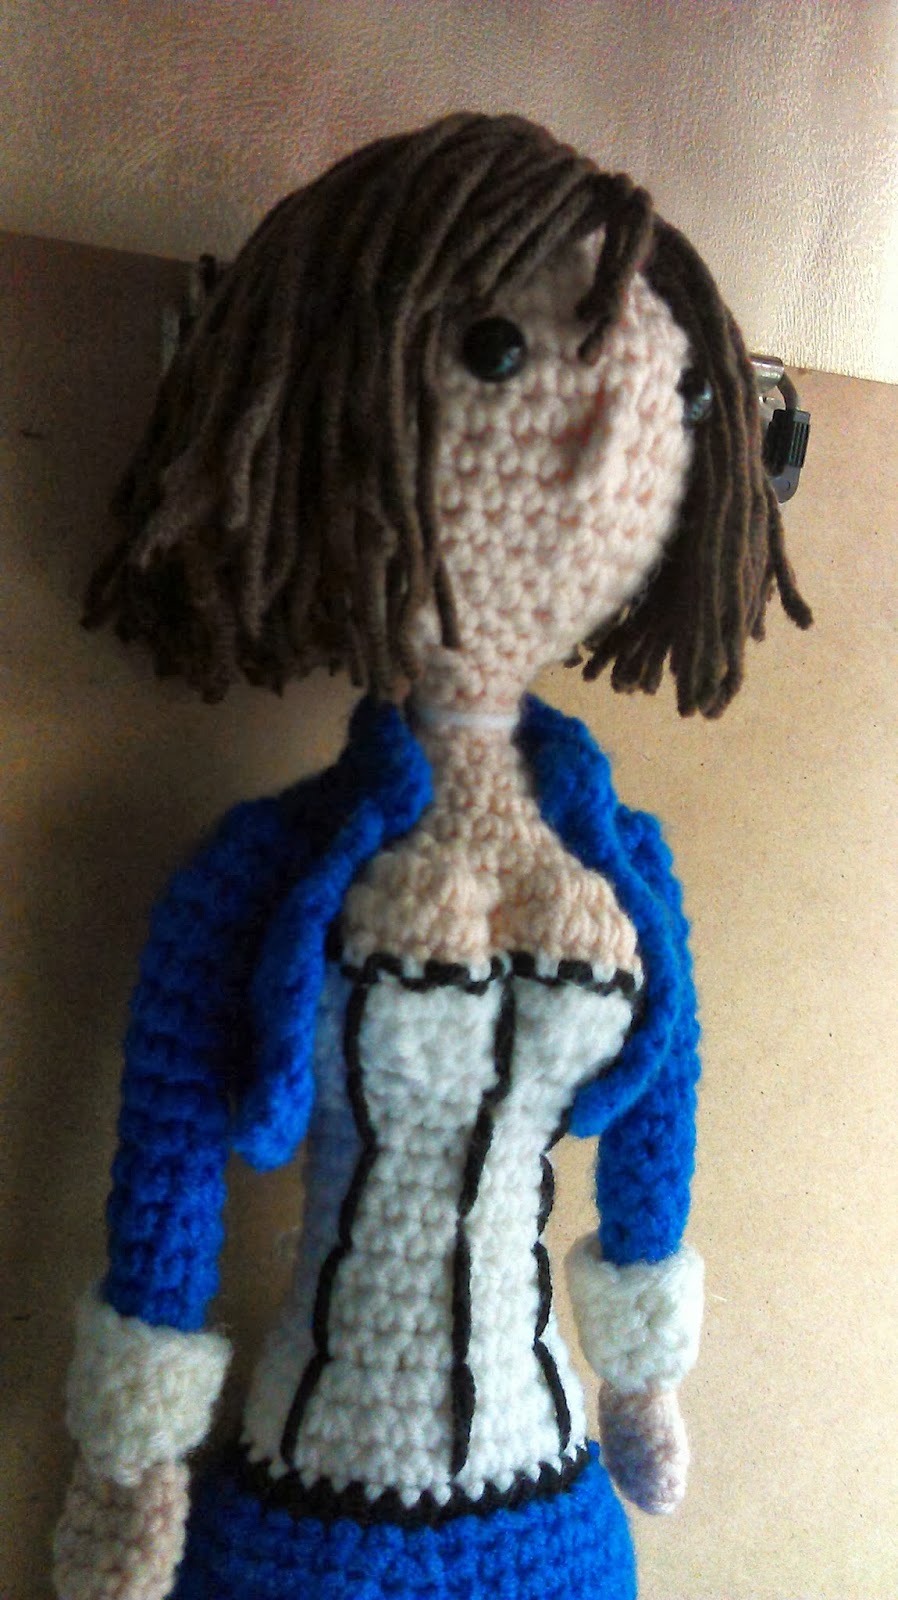
How in the world can I not make an Elizabeth amigurumi with the amount of love I have for her? So, taking a break from my dear dwarfs, I went for it~ And as an added bonus, here's the free pattern =)


Okay, so here's the picture I used for reference. I used pretty much the same pattern for all my humanoid amigurumi's and Elizabeth is no different.

First, a photo spam~


Materials you'll need: yarn (blue, black, dsark brown, white, skin), 2.5mm (4/0) crochet hook, stuffing, 8mm eyes, yarn needle, stitch marker

Important!!!!!! Note: Parts of the pattern are incomplete. I redid some things while making this and didn't always note the changes down. Please go through the entire pattern before deciding whether to begin the project. Don't want people wasting good yarn. 
.
Head and Body

*Stuff as you go along.*

Rnd1: With skin color, ch 5, sc in sec. ch from hook, sc in next 2 ch, 2sc in next ch. In back loops, sc in next            3 ch, 2sc in next ch. (10 sc)

Rnd 2: 2sc in next sc, sc in next 2 sc, 2sc in next sc, sc in next sc, 2sc in next sc, sc in next 2 sc, 2sc in next              sc, sc in next sc. (14 sc)

Rnd 3: Sc in next sc, 2sc in next sc, sc in next 3 sc, 2sc in next sc, sc in next sc, 2sc in next sc, sc in next 4                sc, 2sc  in next sc, sc in next sc (18 sc)

Rnd 4: Sc in next 3 sc, 2sc in next sc, sc in next 4 sc, 2sc in next sc, sc in next 3 sc, 2sc in next sc, sc in next 4 sc, 2sc in next sc. (22 sc)

Rnd 5&6: Keep increasing in each corner (increase 4 stitchs in each round) until stitch count is 30. (30sc)

Rnd 7: *sc in next 4 sc, 2sc in next sc* repeat to end. * (36 sc)

Rnd 8~11: sc all around (36 sc)

Rnd 12: sc in next 16 sc, sc2tog, *sc in next 4 sc, sc2tog* twice, sc in next 6 sc (33sc)

Rnd 13: repeat row 12 (30 sc)

Rnd 14: *sc in next 3 sc, sc2tog* 6 times (24sc)

It's a good idea to put in the eyes now. I put mine between rows 7 and 8, about 5 stitches apart.

Rnd 15: *sc in next 2 sc, sc2tog* 6 times (18sc)

Row 16: *sc in next 4 sc, sc2tog* 3 times (15sc)

Rnd 17: *sc in next 3 sc, sc2tog* 3 times (12sc)

Rnd 18: *sc in next sc, sc2tog* 4 times (8sc)

Rnd 19~21: sc all around (8sc)

Rnd 22: *sc in next sc, 2sc in next sc* (12sc)

Rnd 23: *sc in next 3 sc, 2sc in next sc* 3 times (15sc)

Rnd  24: *sc in next 4 sc, 2sc in next sc* 3 times (18sc)

Rnd 25: *sc in next 2 sc, 2sc in next sc* 6 times (24 sc)

Rnd 26: *sc in next 5 sc, 2 sc in next sc* 4 times (28sc)

Now, it's time to start on the breasts. Because you might have put the eyes in a slightly different place than mine, I'm just going to explain how the next round goes instead of giving specific stitch counts.

Rnd 27: First, you're going to figure out where the point between her breasts are going to be. Find the point between the eyes and trace down to find the center stitch. Mark it with a stitch marker (I don't have one handy so I improvised with a paperclip). Count 4 stitches on either side of the marked stitch. Sc until you reach the 4 stitches, then crochet the following: *2sc in next sc, 3sc in next 2 sc, 2 sc in next sc*. Sc on the marked stitch, then repeat from *to*. (40sc)

Rnd 28~29: sc all around (40sc)

Rnd 30: Switch to white, sc all around, but this time skip the center stitch. (39sc)


Rnd 31: Sc all around. (39sc)

Rnd 32: Count 10 stitches on each side of the center stitch. You will now be decreasing. Sc until you reach the 10 stitches, then crochet the following *sc in next sc, sc2tog four times, sc in next sc* twice. (31sc)

Rnd 33: Count 6 stitches on each side of the center stitch. Sc until you reach the 6 stitches, then crochet the following *sc in next sc, sc2tog twice, sc in next sc* twice. (27 sc)

Rnd 34: *Sc in next 7 sc, sc2tog in next sc* three times. (24 sc)

Rnd 35: * Sc in next 4 sc, sc2tog in next sc* 4 times. (20 sc)

Rnd 36~40: Sc all around. (20 sc)

Rnd 41: *Sc in next 4 sc, 2sc in next sc* 4 times. (24 sc)

Rnd 42: *Sc in next 7 sc, 2sc in next sc* 3 times. (27 sc)

Rnd 43: *sc in next 8 sc, 2sc in next sc* 3 times. (30 sc)

Rnd 44: sc all around (30sc)

Rnd 45: sc all around. (30 sc)

Rnd 46: in back loops only, *sc in next 8 sc, sc2tog* 3 times. (27sc)

Legs (continue from body)

Rnd 47~48: sc all around. (27sc)

Find the center stitches again (this time we'll need to note the one on the back as well), and mark them with stitch markers.


Rnd 49: sc to the marked stitch, ch 2, sc on second marked stitch, sc on the 2 ch towards the first marked stitch. Continue the round until you reach the second marked stitch.

You'll be working with legs separately from now on. For the second leg, sc along the back loops of the 2 ch made in round 49. Each leg should start with roughly 16 sts around, adjust by sc2tog or 2sc if necessary.

Legs (separate)

Rnd 1: sc all around (16sc)

Rnd 2: * sc in next 2 sc, sc2tog in next sc* 4 times (12sc)

Rnd 3~11: sc all around (12 sc)

Rnd 12: *sc in next sc, sc2tog* 4 times (8sc)

Rnd 13~21: sc all around (8sc)

Rnd 22: *sc in next 2 sc, sc2tog* twice (6sc)

Rnd 23: sc all round (6sc)

Skirt

Rnd 1: sc around the front loop of round 45 of the body. (30sc)

Rnd 2: *sc in next 4 sc, 2 sc in next sc* 6 times (36sc)

Rnd 3: *sc in next 5 sc, 2 sc in next sc* 6 times (42sc)

Rnd 4~23: sc all around (42sc)

Rnd 24: In front loops only, sc all around (42 sc)

Rnd 25: sc all around (42sc)

Rnd 26: In white, sc all around in back loops of rnd 23 (42sc)

Bolero (front, make two)

Row 1: ch 4, sc in 2nd ch from hook, sc through the row. (3 sc)

Row 2: ch to the end. (3 sc)

Row 3: ch in next 3 sc, 2sc in next sc (4 sc)

Row 4: ch to the end. (4 sc)

Row 5: ch in the next 4 sc, 2sc in next sc (5 sc)

Row 6~8: ch to the end (5 sc)

Row 9: ch in the next 5 sc, 2sc in the next sc (6 sc)

Row 10~12: ch to the end (6 sc)

Bolero (back)

Row 1: ch 13, sc in second ch from hook, sc to the end (12 sc)
Row 2: sc to the end. (12 sc)
Row 3: 2sc in first sc, sc to the last sc, 2sc in last sc. (14 sc)
Row 4~12: sc to the end. (14 sc)

Now sew the front pieces to the back to complete the Bolero, leaving a gap in the space where the arms would go.

Arms (make two)

Rnd 1: Make magic circle of 6 scs. (6 sc)

Rnd 2: *sc in next 2 sc, 2 sc in next sc* twice (8 sc)

Rnd 3~16: sc all around (8sc)

Rnd 17: *sc in next 2 sc, sc2tog in next sc* twice (6 sc)

Rnd 18: switch to white, sc all around (6 sc)

Rnd 19: *sc in next 2 sc, 2sc in next sc* twice (8sc)

Rnd 20: *sc in next 3 sc, 2sc in next sc* twice (10sc)

Rnd 21: sc all around (10 sc)

Fold white part up.

Hands (make two)

Rnd 1: ch 4, sc in 2nd ch from hook, sc in next ch, 2sc in next ch. In back loops, sc in next 2 sc, 2 sc in next sc (8 sc)

Rnd 2: *sc in next 3 sc, 2sc in next sc* twice (10 sc)

Rnd 3~4: sc all around (10 sc)

Rnd 5: *sc in next 3 sc, sc2tog in next sc* twice (8 sc)

Rnd 6: *sc in next 2 sc, sc2tog in next sc* twice (6 sc)

Sew to arms.

Boots (make two)

Rnd 1: ch 4, sc in 2nd ch from hook, sc in next ch, 2sc in next ch. In back loops, sc in next 2 sc, 2 sc in next sc (8 sc)

Rnd 2:  2 sc in next sc, sc in next 2 sc, 2sc in next 2 sc, sc in next 2 sc, 2sc in last sc (12 sc)

Rnd 3~4: sc all around (12 sc)

Now's the part I failed to take note of. Basically I did sc for the top of the boots (6 sc), then an hdc, then 4 dcs, and an hdc. I repeated this for around 3 more rows, sometimes decreasing where the hdc should be and increasing immediately after to make up for stitch count. I did a few more rows after that, to where I think the ankles might be, then sc around to the center point in the front of the boot, turn, sc around again to the center, turn, and continue as so for a few more rows.

Hair

Find where you want the hair to be parted. With dark brown (should be darker than what I used >  <) knot 2 rows along that line, each parted a different way, and contine knotting rows under that. It's best to do just enough rows so that the scalp is not exposed. Too many rows can make the hair to poufy. I glue a layer of  hair to the scalp so that she won't go bald every time someone holds her upside down.


Diagram of how I knotted the hair on. Red lines represent starting rows. 

How I knot the hair on is in this post: http://crochetfangirl.blogspot.tw/2013/02/amigurumi-hair-tutorial-pigtails.html

I did a row and a half of scs in skin color on her face as the nose, I don't have it written down exactly what I did, but this is competely optional and not hard to figure out.

Now embroider the black lines onto the corset, and her necklace (I did mine in white), style her hair a bit, and voila!


My Elizabeth now stays happily with my friend (he'll probably want to stay unnamed XD), who refers to her as his daughter, and promises to take her to Paris one day 。◕‿◕。

8.29.2013

The Hobbit- Kili Amigurumi

After I've made Fili, it's time for his brother to join him! Kili is one of my favorite dwarfs in the Hobbit. Fili and Kili remind me of Fred and George in Harry Potter. They're always so full of energy, always making all sorts of mischief, and in general always so perfectly lovable.

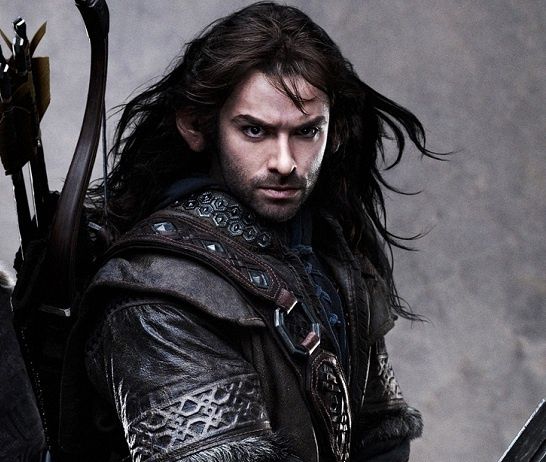
reference photo


I was a bit nervous about his beard- how am I ever going to do that with embroidery without messing up his face? (I am not so confident in the embroidery department) I decided to tackle this with the method the Craftster user queenofcrows suggested to me, felting the beard on with shredded yarn and a felting needle.

I've also run into some trouble with colors. Like I mentioned in the last post, all the dwarfs require shades of brown, but the yarn I'm using has four to five shades of brown, and not one of the dark enough for Kili's hair. So to compromise and distinguish from other dwarfs, I used black for Kili's hair.

I'd put off finishing Kili for awhile while I rushed up to Taipei for a convention, so I had half of him lying helplessly on my desk for over a week XD

Kili about to get his beard and mustache felted on.

Shredding the yarn was slow work, but I had fun picking everything apart over an episode of Hannibal or two. I used a jar I had at my disposal to hold the shredded fibers. I only shredded a bit, and it was way more than I needed. I'm saving the leftovers for Thorin. 

It was my first time handling a felting needle, so I was a bit nervous about plunging it into Kili's face right away. I had to pull the fibers out a few times, but eventually it turned out the way I liked.

And here he is~ 


I'm not quite sure about his hair, but I decided to tie it up in the back. Seems to look better from the front that way =)
Details in the front. I think I ended up with a bit too much blue... meh O__o

Kili, at your service!

I don't think I'm completely satisfied with how he looks. I'll be tweaking things here and there, I guess. I'll put an edge of fur along the sleeves and hem of the coat. Do leave a comment and give some suggestions =)

If all goes well, next up will be Gloin and Oin~

One Hobbit, 4 dwarfs down, 9 dwarfs, one wizard to go!!


8.13.2013

The Hobbit- Fili Amigurumi

First of the dwarf princes! I love Fili, but one look at his hair and beard gave me a headache. All those braids! But I can't let the hair (and beard) style daunt me now, otherwise goodness, what ever shall I do once I start on Nori?

I'm using mostly Ex991, a Taiwan-made, 100% acrylic yarn that I find to be perfect for amigurumis. It comes in a variety of colors, but since the dwarfs all have color palettes of earthy tones, I'm finding it difficult to get enough shades of brown. As a result, I compromised some of the color differences in the clothes, and changed the color of the boots.

Here's Fili's head when I'm stitching the hair on:


He looked a bit like Lord Elrond at first!!! Everyone told me he looked more elf than dwarf. I seem to have a knack for ruining the honor of all dwarf-kind. I sincerely hope I woke wake up to all my dwarfs attempting to strangle me someday.

The Craftster user queenofcrows left me the wonderful suggestion of using felting needles to apply shredded yarn to make the beard and stubble. I don't have a felting needle with me though, so I went and embroidered. It worked out okay for Fili, but I'll definitely try the new method on Kili. (I've got the yarn all shredded and stored away for later use~).

Anyway, here he is after growing a beard, hopefully less elf-like:


Then I did a bunch of slacking off before finally finishing the rest of him after half a season of Hannibal. (Spectacularly creepy show that gave me goosebumps, by the way. Love it despite having trouble eating meat afterwards.) 


The furry yarn used for his coat sheds everywhere!! It drove me absolutely mad! I believe I inhaled some in the process. All things aside though, I love working with different yarn, and this one is no different =)

Next up is Kili! I've finished about half as of typing this post up, but I've run out of yarn so it'll be awhile. Oh, and I also need a felting needle XP

I haven't decided on where these dwarfs will go once they are finished. I know for sure that I don't want them separated from one another, and that I'll be taking them to the movie premieres. So until the trilogy ends, I won't be parting with them just yet! Then again this is just the third dwarf, so I still have a long way to go before deciding things like these.

1 hobbit, 3 dwarfs down, 10 dwarfs, 1 wizard to go!